
How to include JAVASCRIPT on your simple HTML and CSS signup page and deploy to Netlify.


Now you are done creating your simple signup and login page using HTML and CSS, and you’re feeling proud of your hard work. Guess what is still missing; you have no idea how to publish your website.
You may wonder why your HTML website has not been hosted on the internet. Worry no more. I am right here to explain them to you.
In the previous article, we were able to learn how to create a simple signup and login page using HTML and CSS. for it to be hosted on the internet, you need to include your JAVASCRIPT on your HTML and CSS. in this article, I’ll show you how to have JAVASCRIPT on your simple HTML and CSS signup page, and to deploy it to netlify. Let's take a look at the meaning of JAVASCRIPT and NETLIFY.
Introduction
Javascript, often abbreviated as JS, is a programming language that is one of the core technologies of the World Wide Web, alongside HTML and CSS.
Programmers mostly use Javascript worldwide to create dynamic and interactive web content like applications and browsers. JavaScript is a simple and easy-to-learn programming language compared to other languages such as C++, Ruby, and Python.
Netlify is a platform for hosting websites. It is easy to host sites on Netlify as you don't need to configure it manually–and it's free. If you haven't signed up for an account, now is a good time to do so.
JavaScript is mainly used for web development (front-end and back-end) and mobile app development. As a beginner, start from here when learning a programming language. Today, as you have already learned from the title, I will walk you through including JAVASCRIPT on your simple HTML and CSS signup page and deploying it to netlify.
How to include JAVASCRIPT on your simple HTML and CSS signup page.
Prerequisite
A PC or Android/iOS.
Knowledge of Web forms.
A web browser.
A code and text editor.
Steps to Follow to include JAVASCRIPT on your simple HTML and CSS signup page.
Step 1: Choose an HTML editor: you will need a text editor to create HTML code. I will be using VISUAL CODE EDITOR on the Visual Code APP.
Step 2: Create your HTML file: create a folder on your file manager, you are free to name it whatever you want to. Open your text editor (VS code), create a new file, and save it with the .html extension. You can label your form however you like, like Gtworld.html. Also, create a javascript file and save it .js
Step 3: Copy and paste any website you made. For the sake of example, I'm using our previous article's work
https://dontemple.hashnode.dev/how-to-build-a-simple-signup-page-using-html-and-css-1
Step 4: Add your javascript file.
Now create a JavaScript file with a .js extension. Then link that JS file to the HTML file using the <script> tag. If we include the <script> tag within the <head> section, the JavaScript file will load before loading the HTML file and may cause a few problems. So, it is a best practice to include the <script> tag above the closing </body> tag to speed up the website response time.
|
To display the Login form and Signup form on one web page, we must add an animation part using JavaScript.
Step 5: JavaScript can validate Form Validation User inputs.
The <form> tag in the HTML file includes the onsubmit event type. Then the function can be called when the user tries to submit the form. You can use GET or POST as the method. But it is better to use the POST method as it is more secure than the GET method.
|
Next, go to your JavaScript file and create the function. Then within the function, grab the values input by the user in the form field and check those values using the if/else block. We can use documents.getElementbyID(“ID_name”).value to grab the values input by the user. Then we need to assign those values to variables to use those values to check the conditions.
|
variable_name.length can be used to get the length of the input. Now we can check the required conditions by using if/else conditions and return true or false. If the user inputs are not valid, the function will return false. When the function returns true only, the user can log in or signup. Otherwise, the user will receive an error message.
if
|
If the user inputs are valid, the user can successfully log in or sign up. Then an alert box with the relevant message will be displayed. After you read the error message, click ok. Otherwise, you can not access the other parts of the web page until the box is closed.
|
function checkForm() {
var inputs = document.querySelectorAll("input[required]");
var isValid = true;
for (var i = 0; i < inputs.length; i++) {
if (!inputs[i].value) {
isValid = false;
inputs[i].style.borderColor = "red";
} else {
inputs[i].style.borderColor = "";
}
}
if (!isValid) {
alert("Please fill in all required fields!");
return false;
} else {
return true;
}
}
How to deploy your HTML, CSS and JAVASCRIPT website to netlify.
Step 1: login to https://www.netlify.com/
Once you've logged in, go to the homepage and Click the New site from the git button to add your new website to Netlify.
Step 2: Link to your GitHub
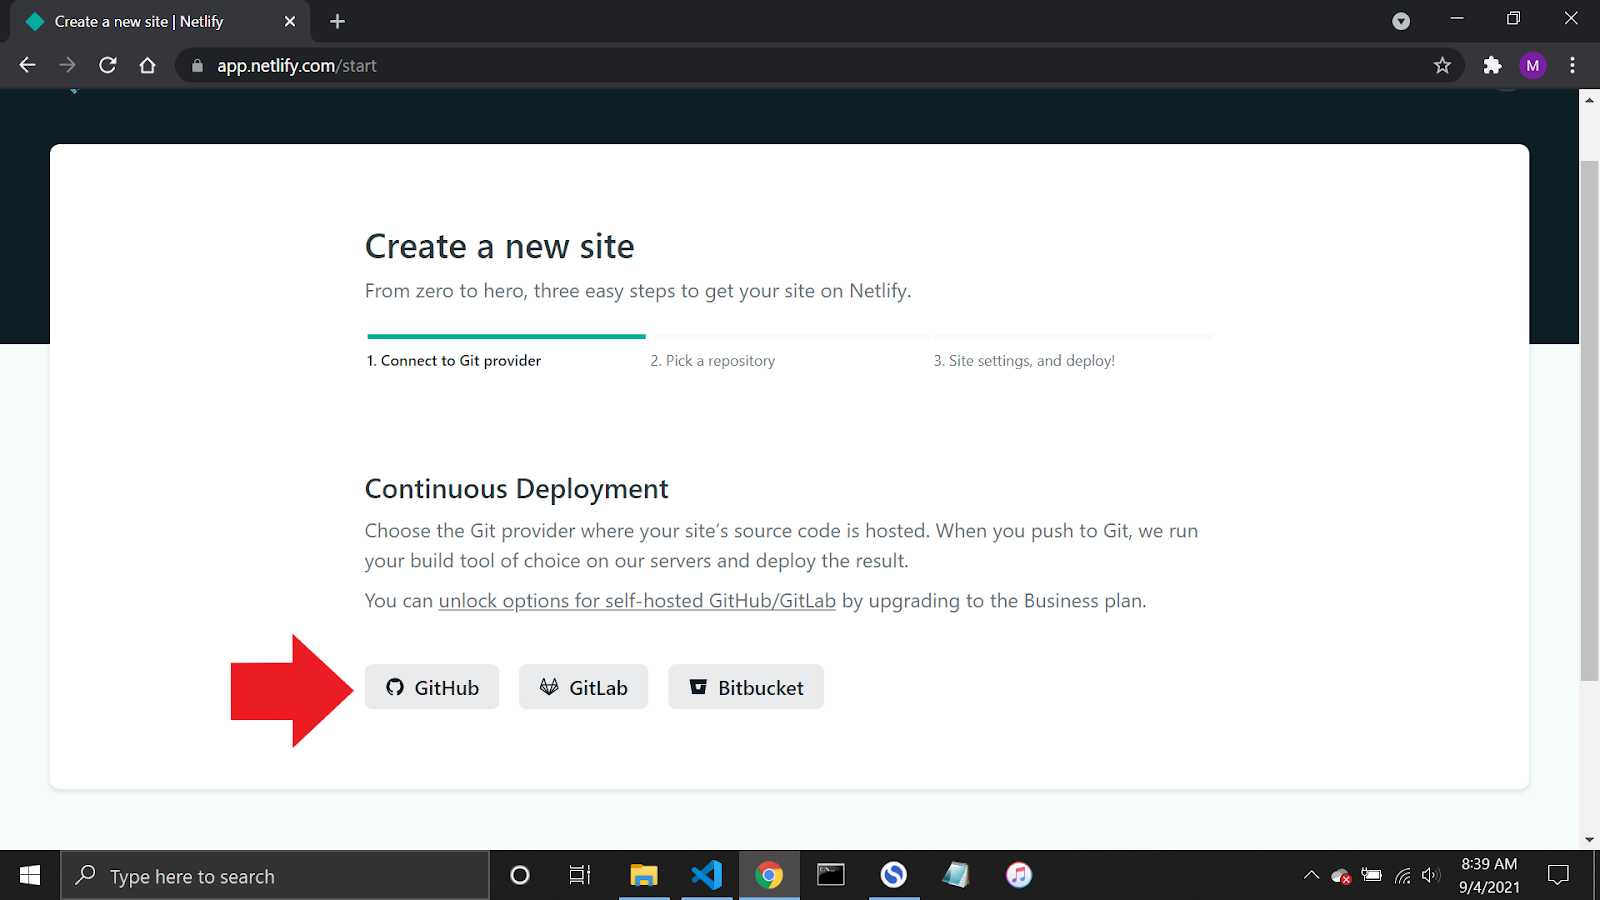
When you click the New site from git button, it will take you to the "Create a new site" page. Make sure you push your repository on GitHub so that Netlify can link to your GitHub account.
Click the GitHub button as shown in the screenshot below:
Step 3: Authorize Netlify
Next, click the Authorize Netlify by Netlify button. This permission is needed so that both Netlify and GitHub can connect.
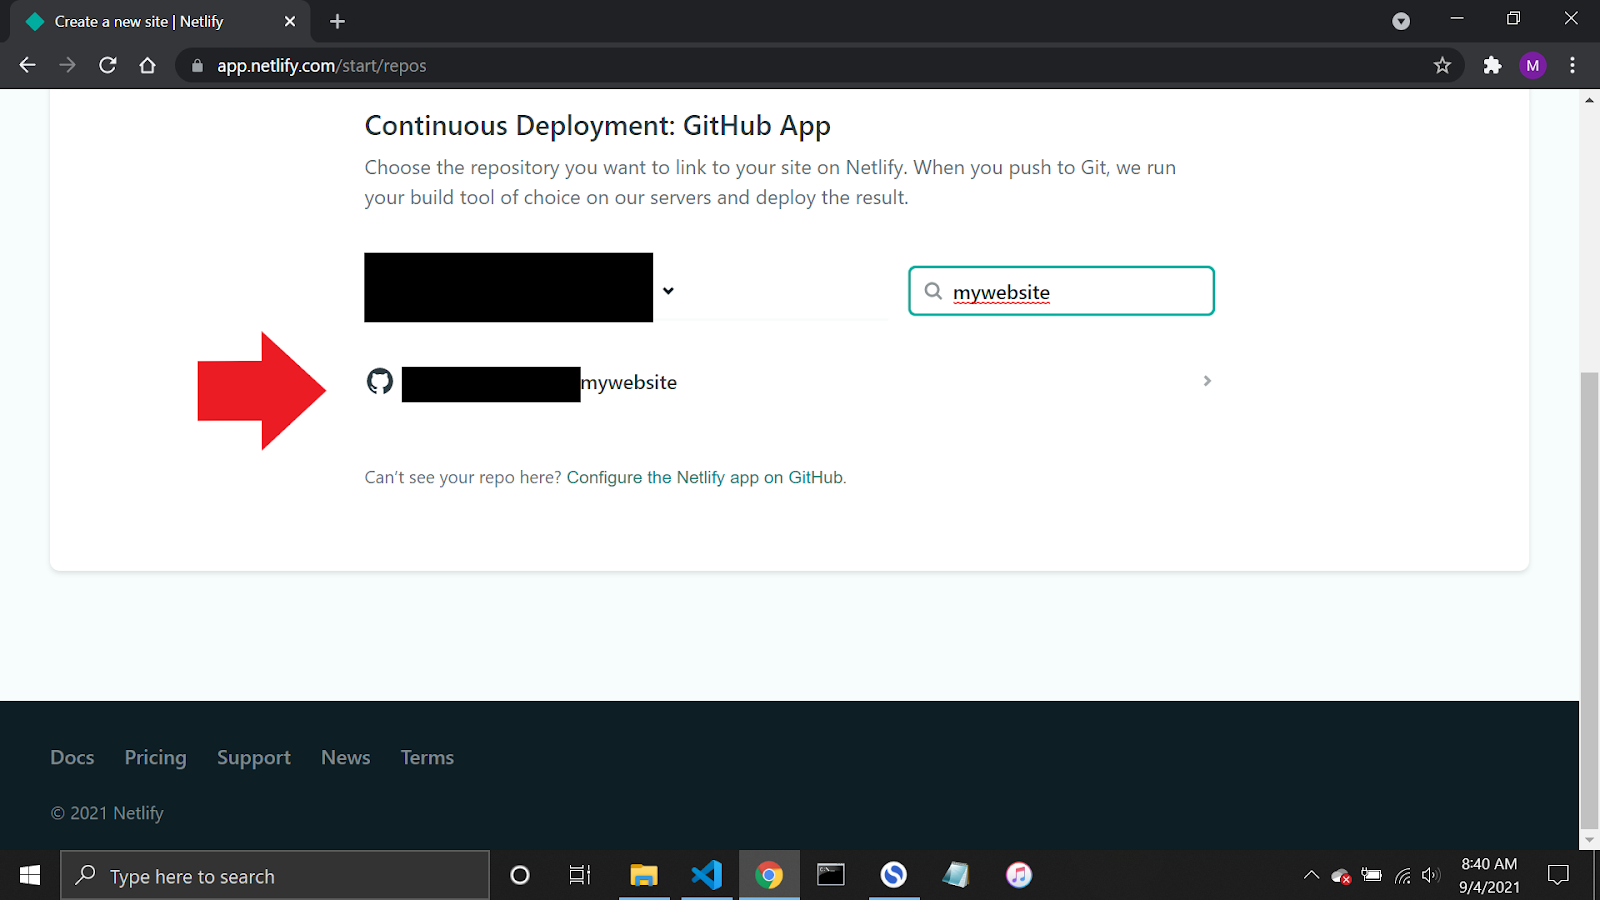
Step 4: Select your repository
Once you grant permission to Netlify, you can see a list of all your repositories. Select your website to publish. You can find it by either scrolling down the list or using the search bar to narrow down the list.
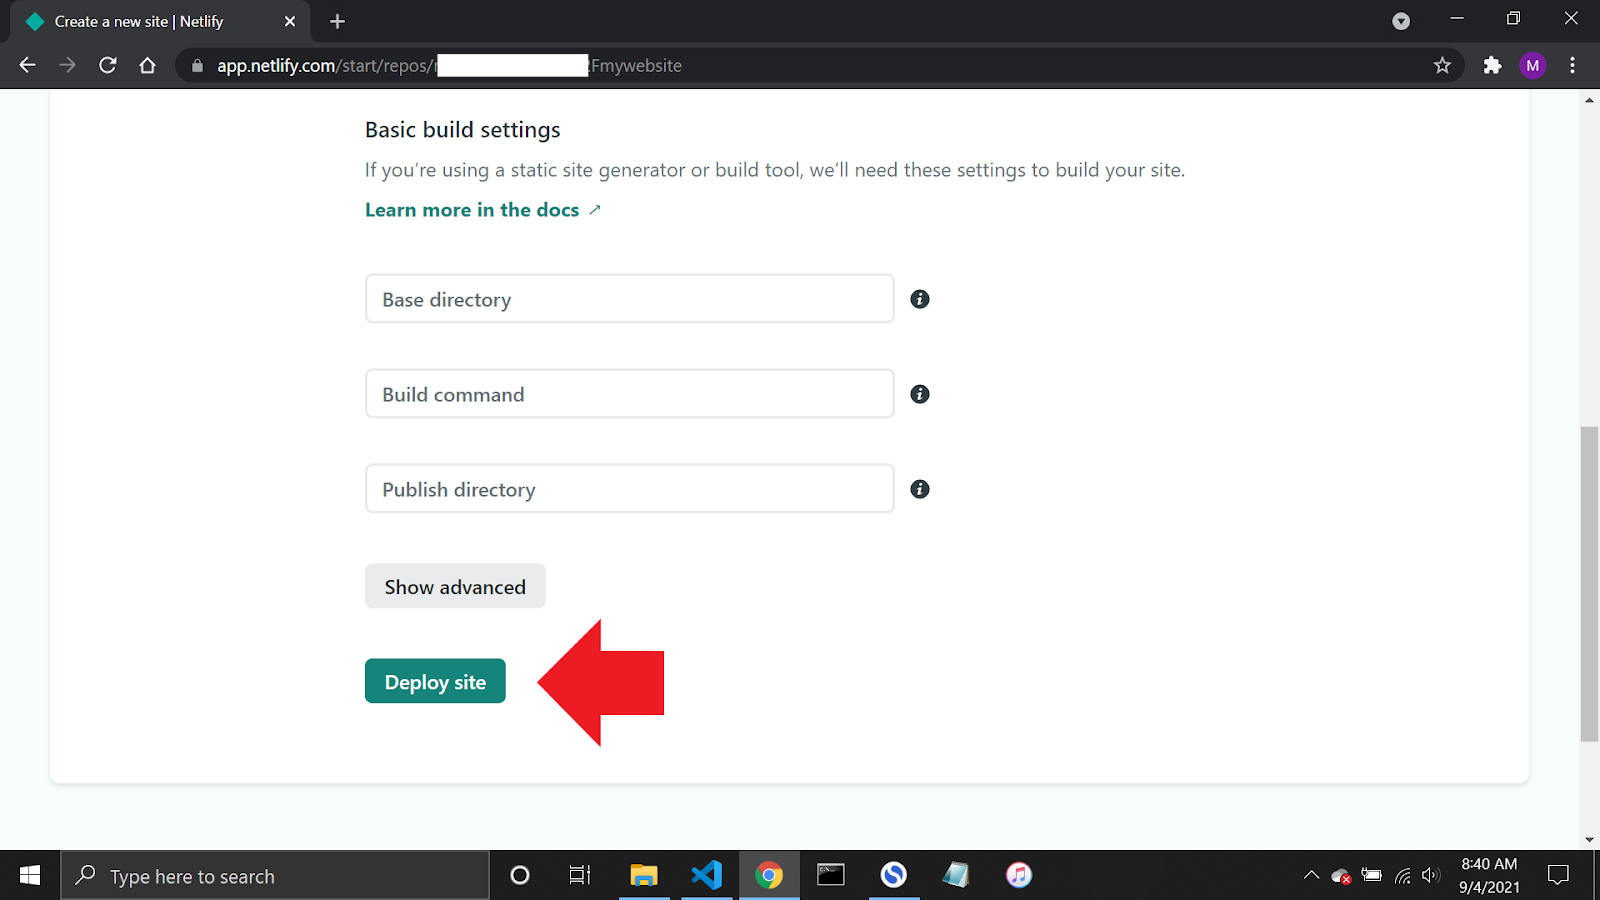
Step 5: Configure your settings
After selecting your website, you will be prompted to configure the settings for deploying the website. Since your website is simply a static one, there's not much to do here. Just click Deploy site to continue.
Step 6: Publish your website
is now ready to publish! Netlify will do the rest of the work for you, and it will only take a minute or so to complete the process.
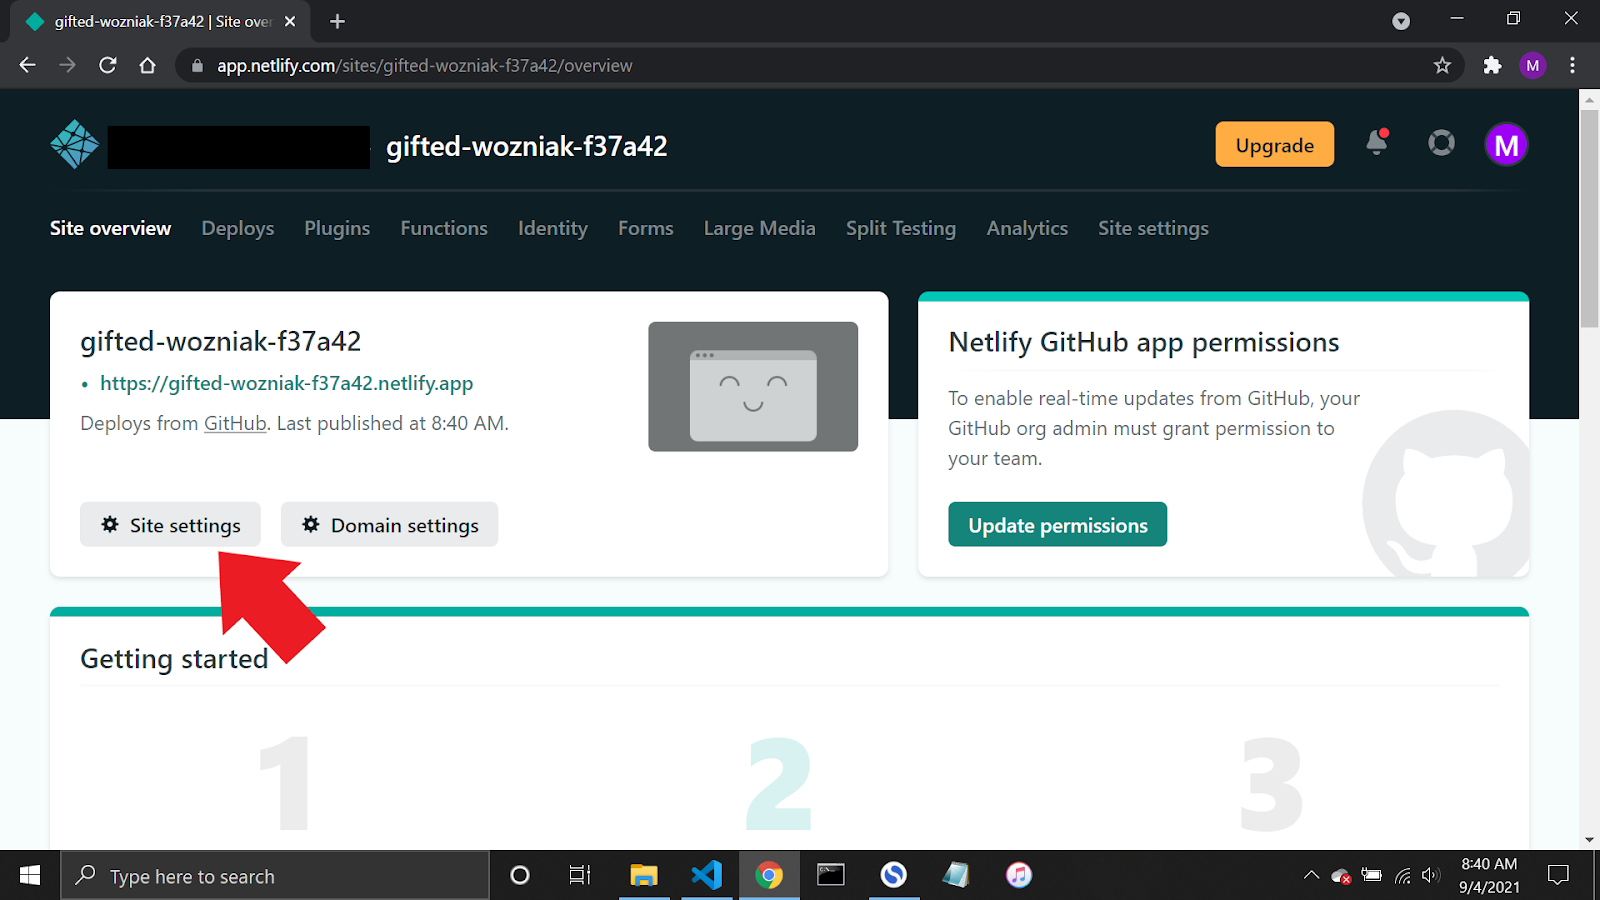
Now you are done! Your new website is published, and you can view it by clicking the green link.
Your URL looks random, but you can edit it by clicking the Site settings button and then the Change site name button.
Congratulations on publishing your first new website!
Conclusion
We've come to the end of this explanation and now you have a fully functional login page created with HTML, CSS and JavaScript. I think this is a great idea for the early stages of learning front-end web development as it can be easily improved upon by adding animations, changing the design of the page or making the validation server-side when you learn a back-end language like Node.js, Java, PHP, etc.